I have not done a furniture project in ages (assembling Ikea and used furniture for the kids rooms doesn’t count!) and am excited to show you how I updated our living room coffee table.
Okay, so technically this is kinda of a second flip, because I bought this coffee table off of OfferUp ages ago and the woman who I bought it from had flipped it after getting it at a second hand store. Anyways, long story short, I decided to redo this coffee table because the wear of 8ish years was really starting to show. Between toddler dance parties a top it, ice cream movie nights, and fierce card games, this thing has stayed strong and sturdy which is fantastic, but the paint was rapidly declining from “distressed” to IN distress.
The top was black and the legs were white and that black just showed every speck of dust and dirt. I didn’t really have a vision, but I knew I didn’t want to have to buy any supplies, and I needed it to be a project that I could get done quickly so that it wouldn’t distract from the busy schedule.
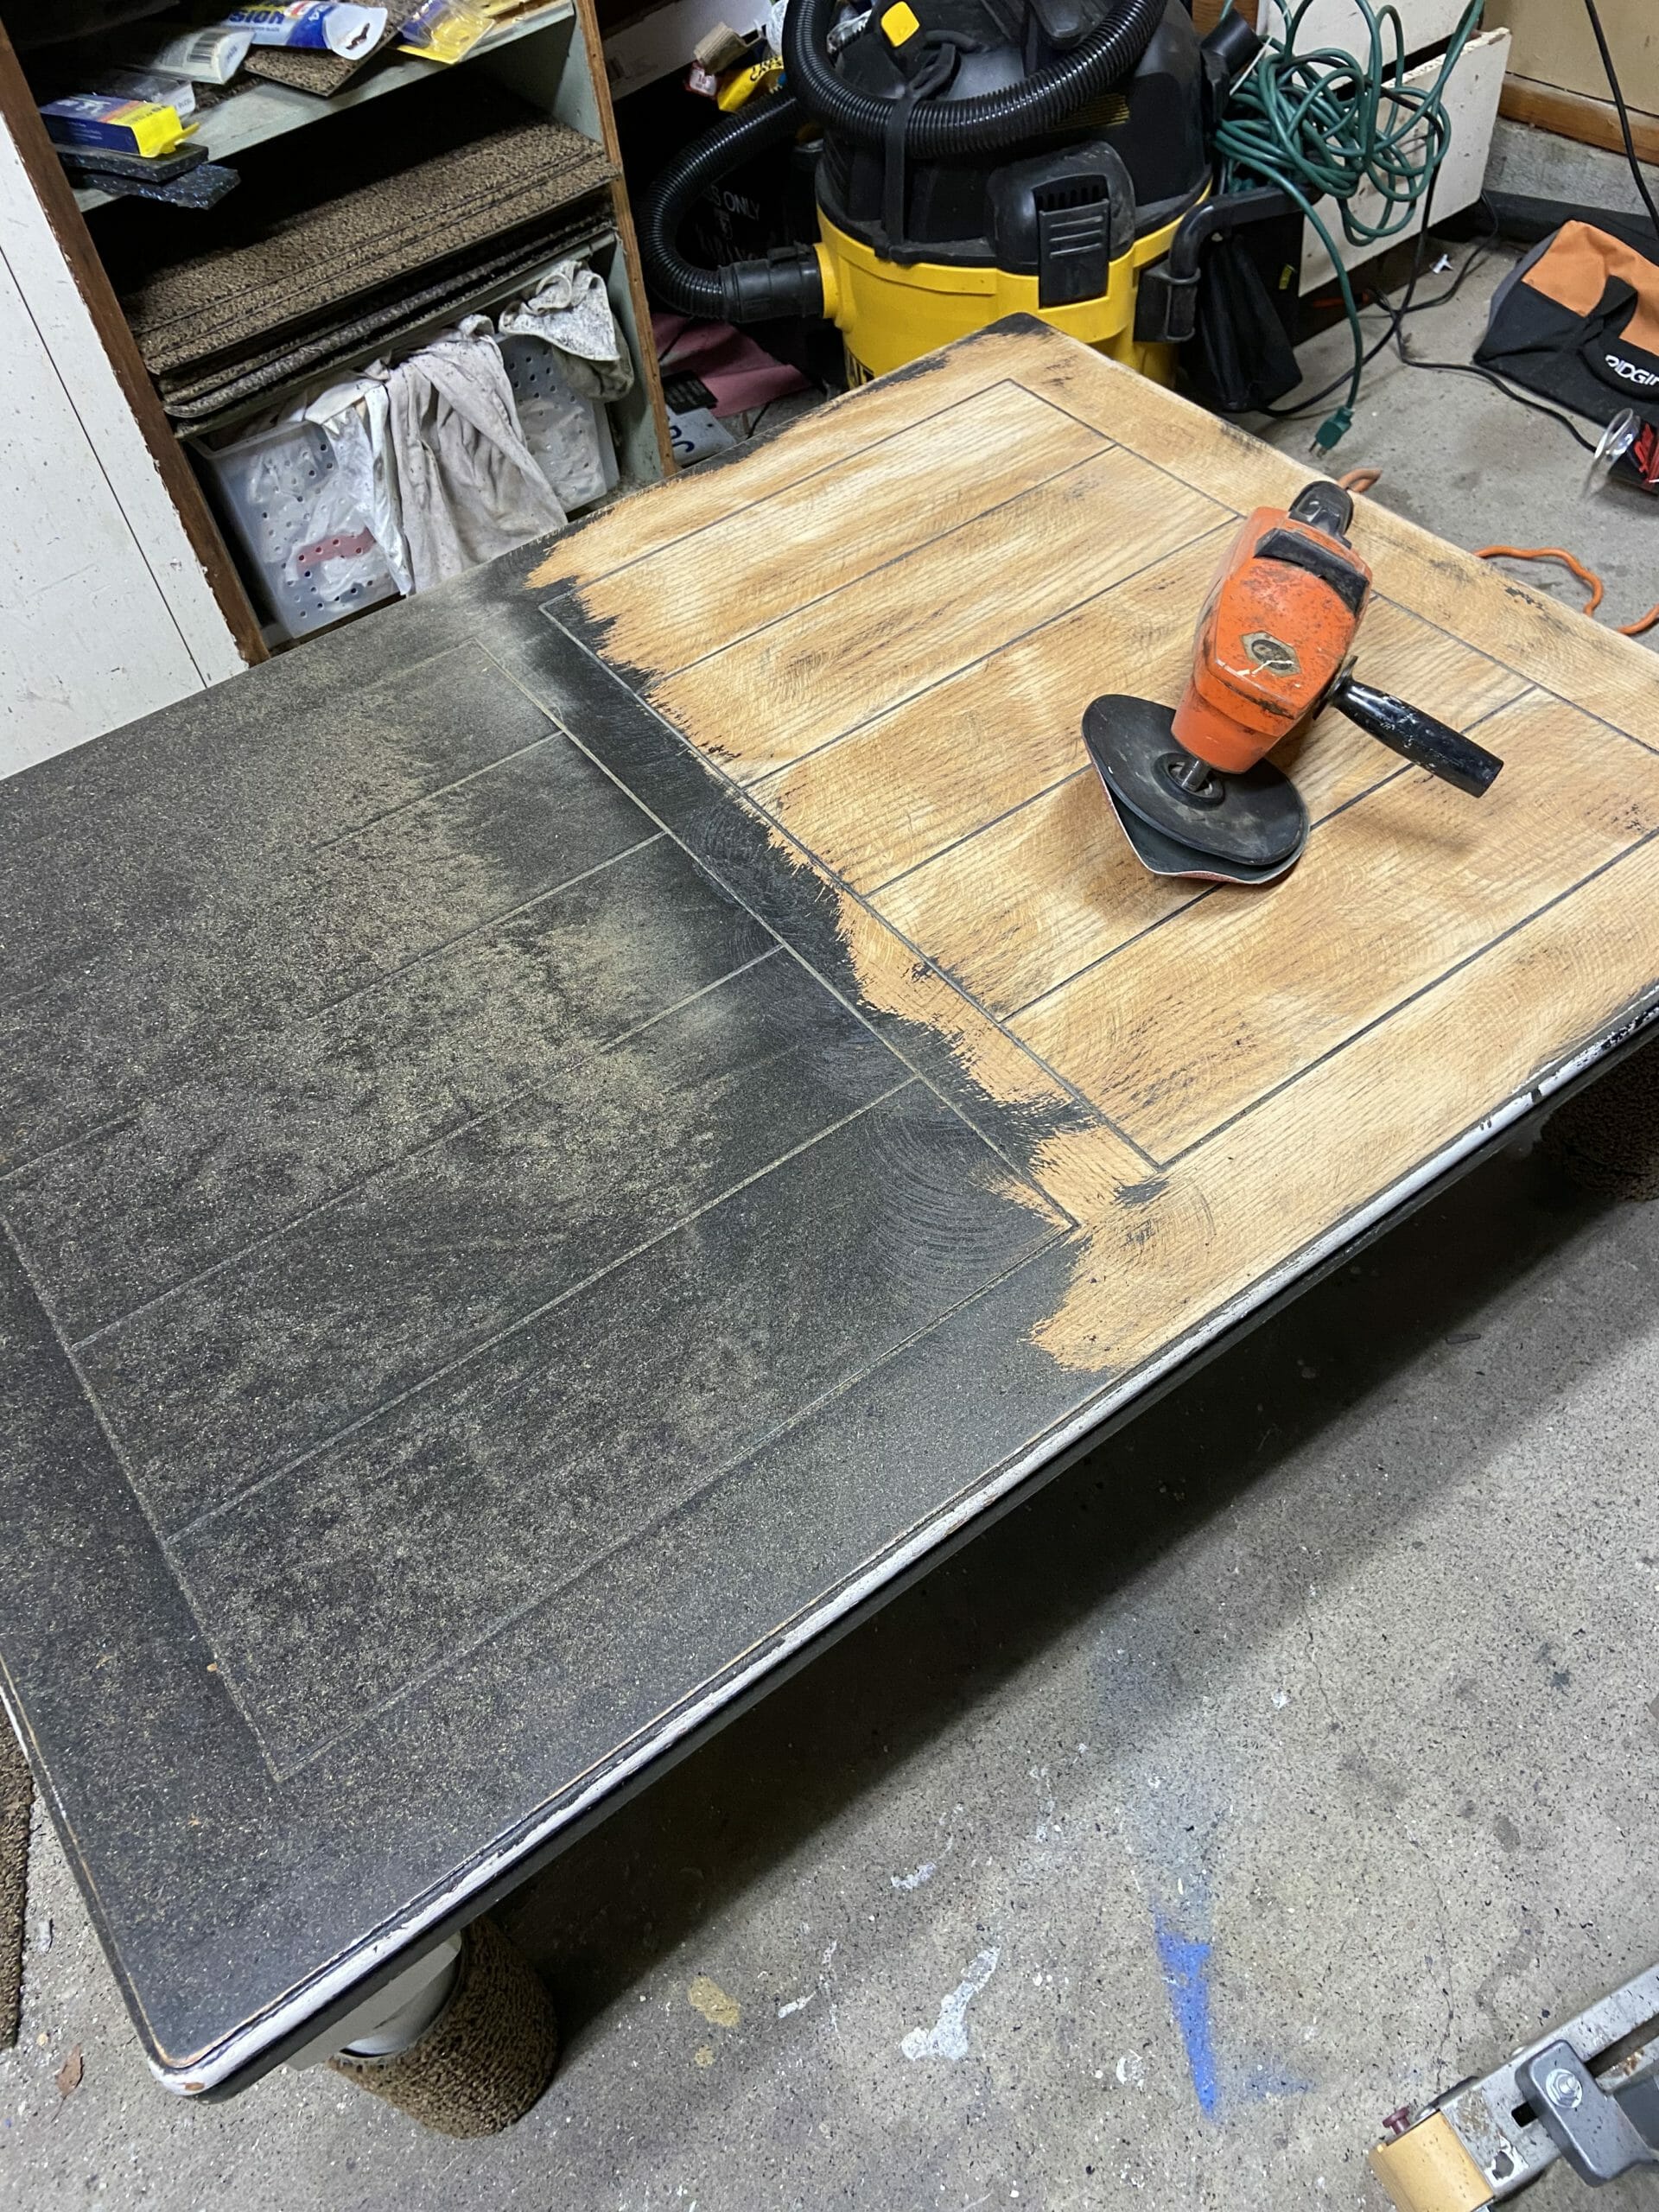
So much dust from the sanding. It was just me out there, the kids were watching a movie.
Husband has two huge sanders in his shop and naturally, C found it for me and plugged it in when I mentioned I wanted to start the project- he’s so helpful with tools! This sander… it is amazing. The whole coffee table was stripped in 20 minutes. I.am.a.FAN.
Glorious hand-me-down sander. I am so grateful!
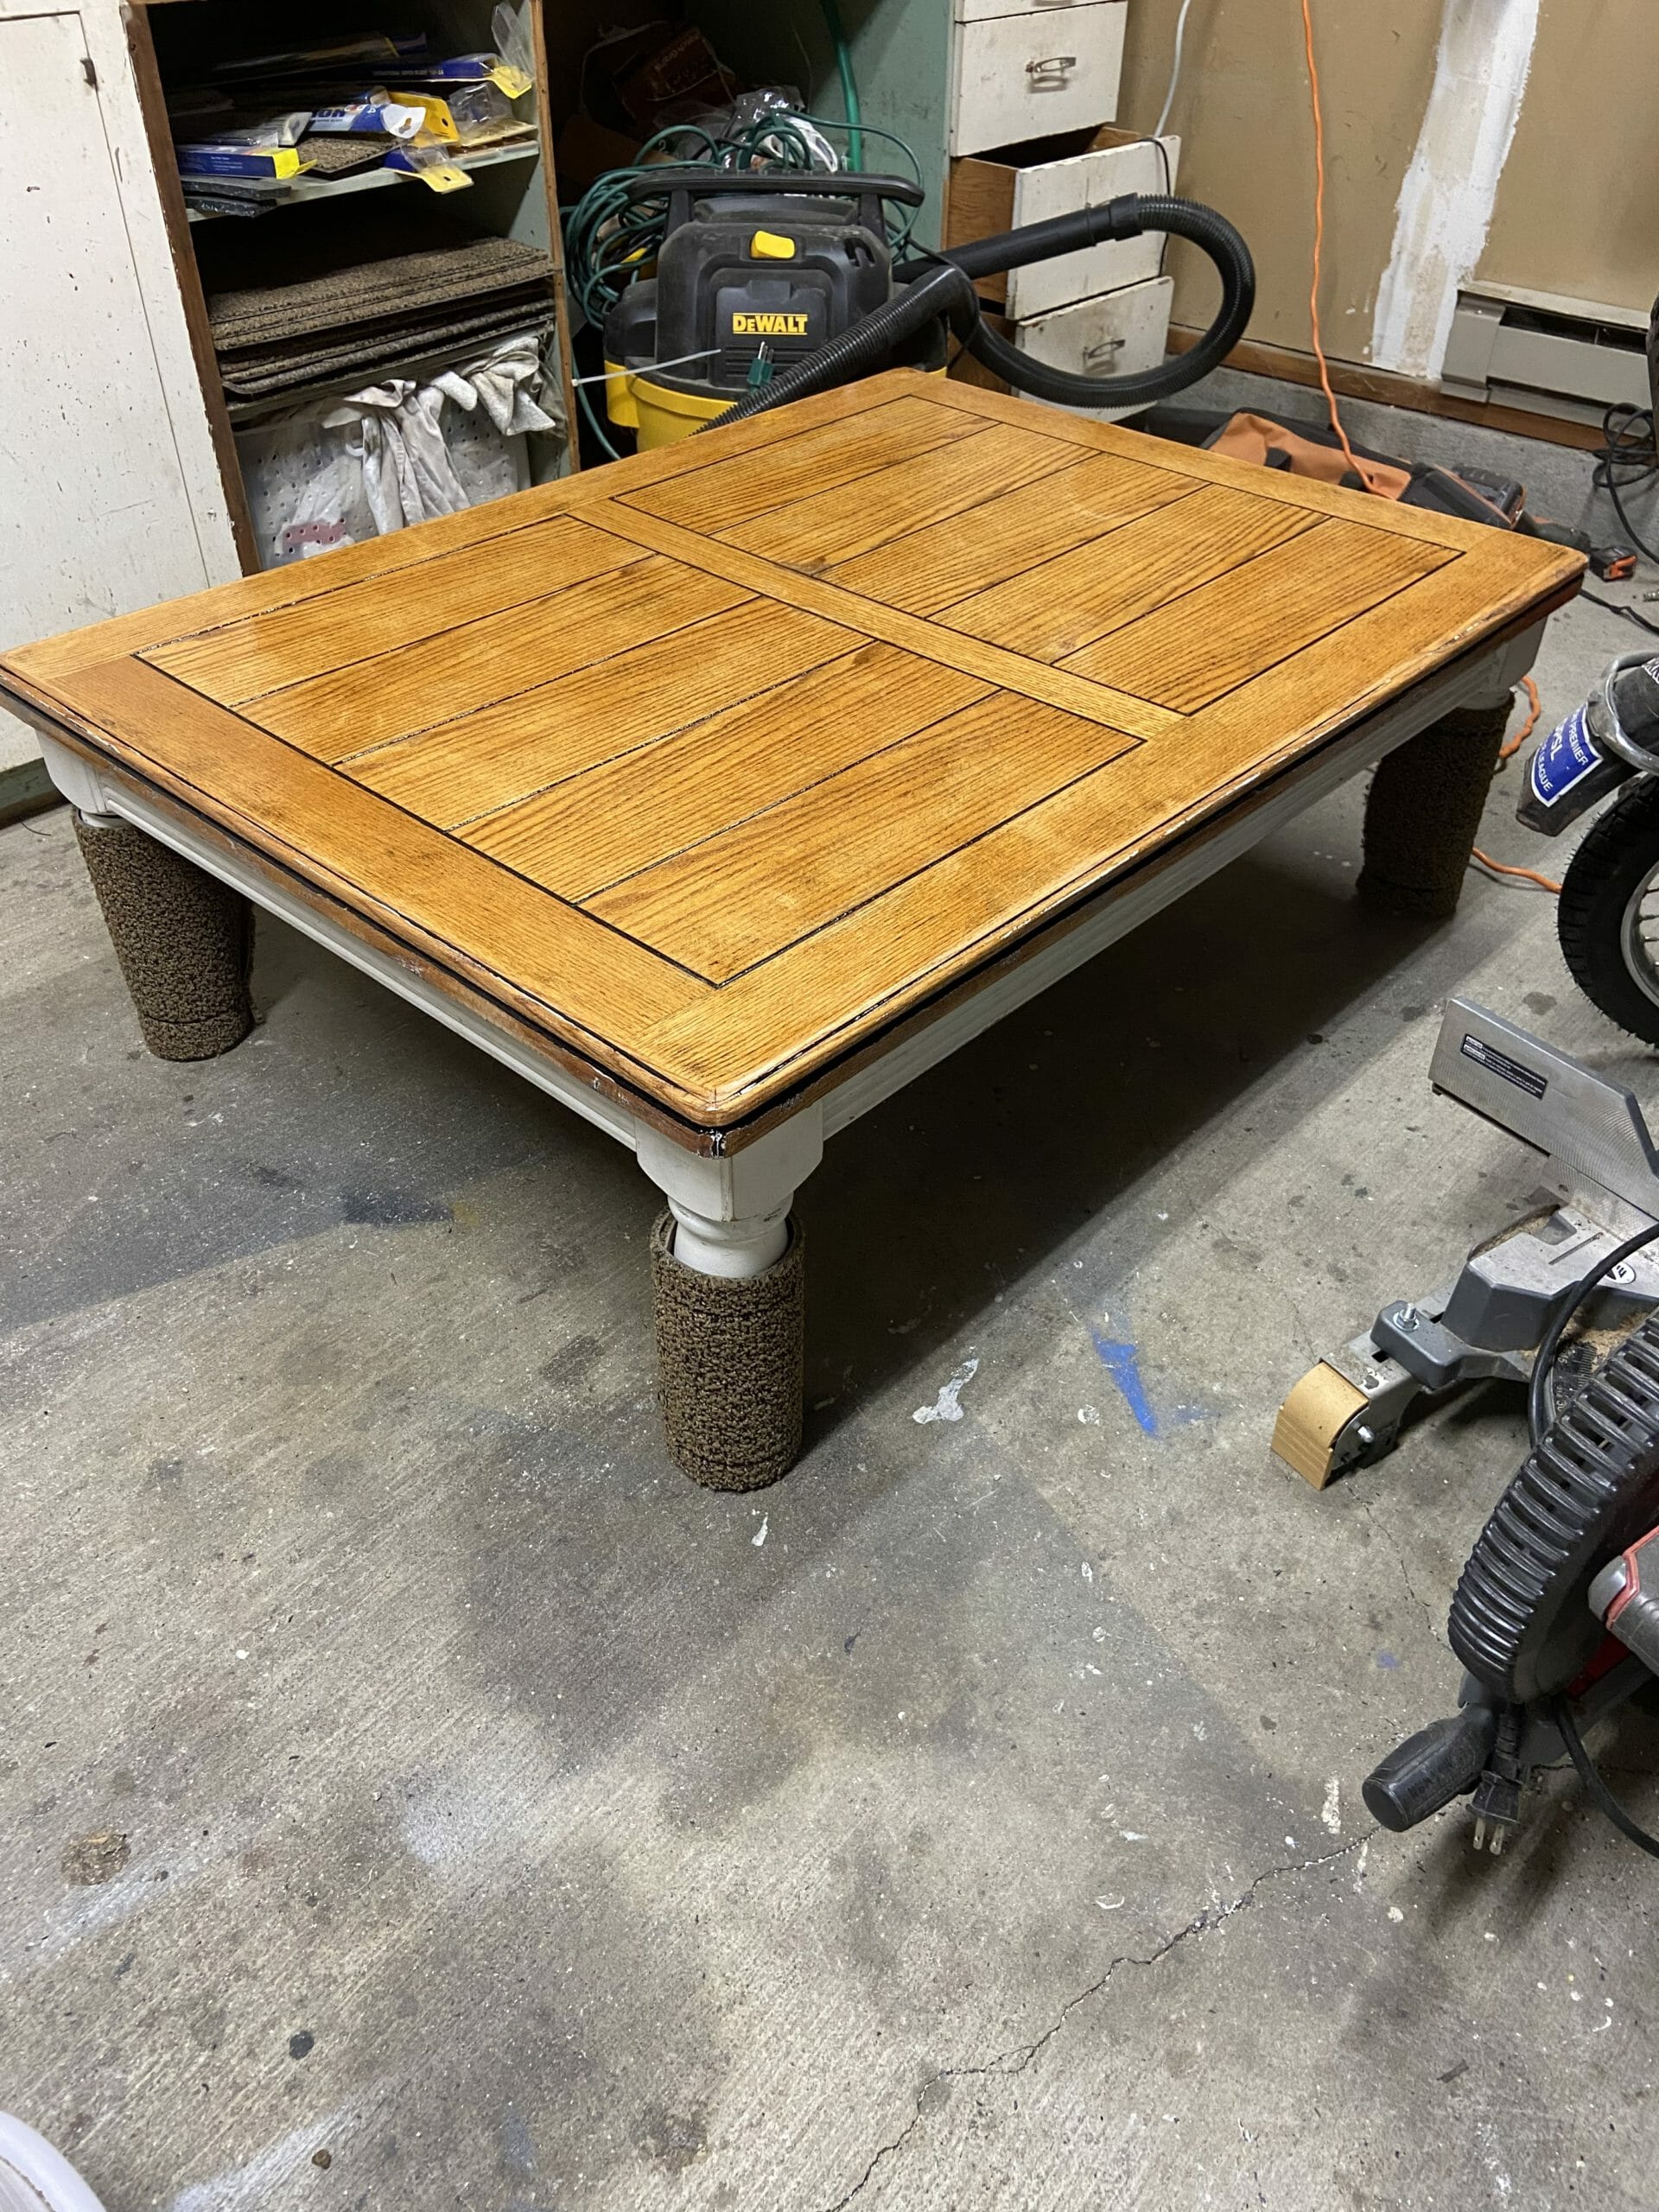
I really like natural wood, but that stripped color wasn’t quite right; it was just a tad pale. I thought of ways I could keep the natural look but darken it up a bit without spending any money on stain. Luckily, I have a bit of experience with natural dyes and oo lala, coffee to the rescue! I brewed up some strong black coffee and poured it all over the table and let it sit for about 30 minutes, then I rubbed it in really well and did it again.
I left the black paint in the lines you see there on the top and sides because I really liked the look. After the coffee throughly dried I got my wood burning pen and wrote our names on the top. Kinda spontaneous and fun. I don’t have any plans to get rid of the coffee table since it is one of our most solid pieces of furniture, so I thought, why not? I got the wood burning pen years ago so that I could inscribe the year on a wood round from each of our Christmas tree trunks. They then become ornaments. It is a really special tradition.
Hey, it’s really hard to write neatly with those pens, haha. This is a close up, before I sealed it.
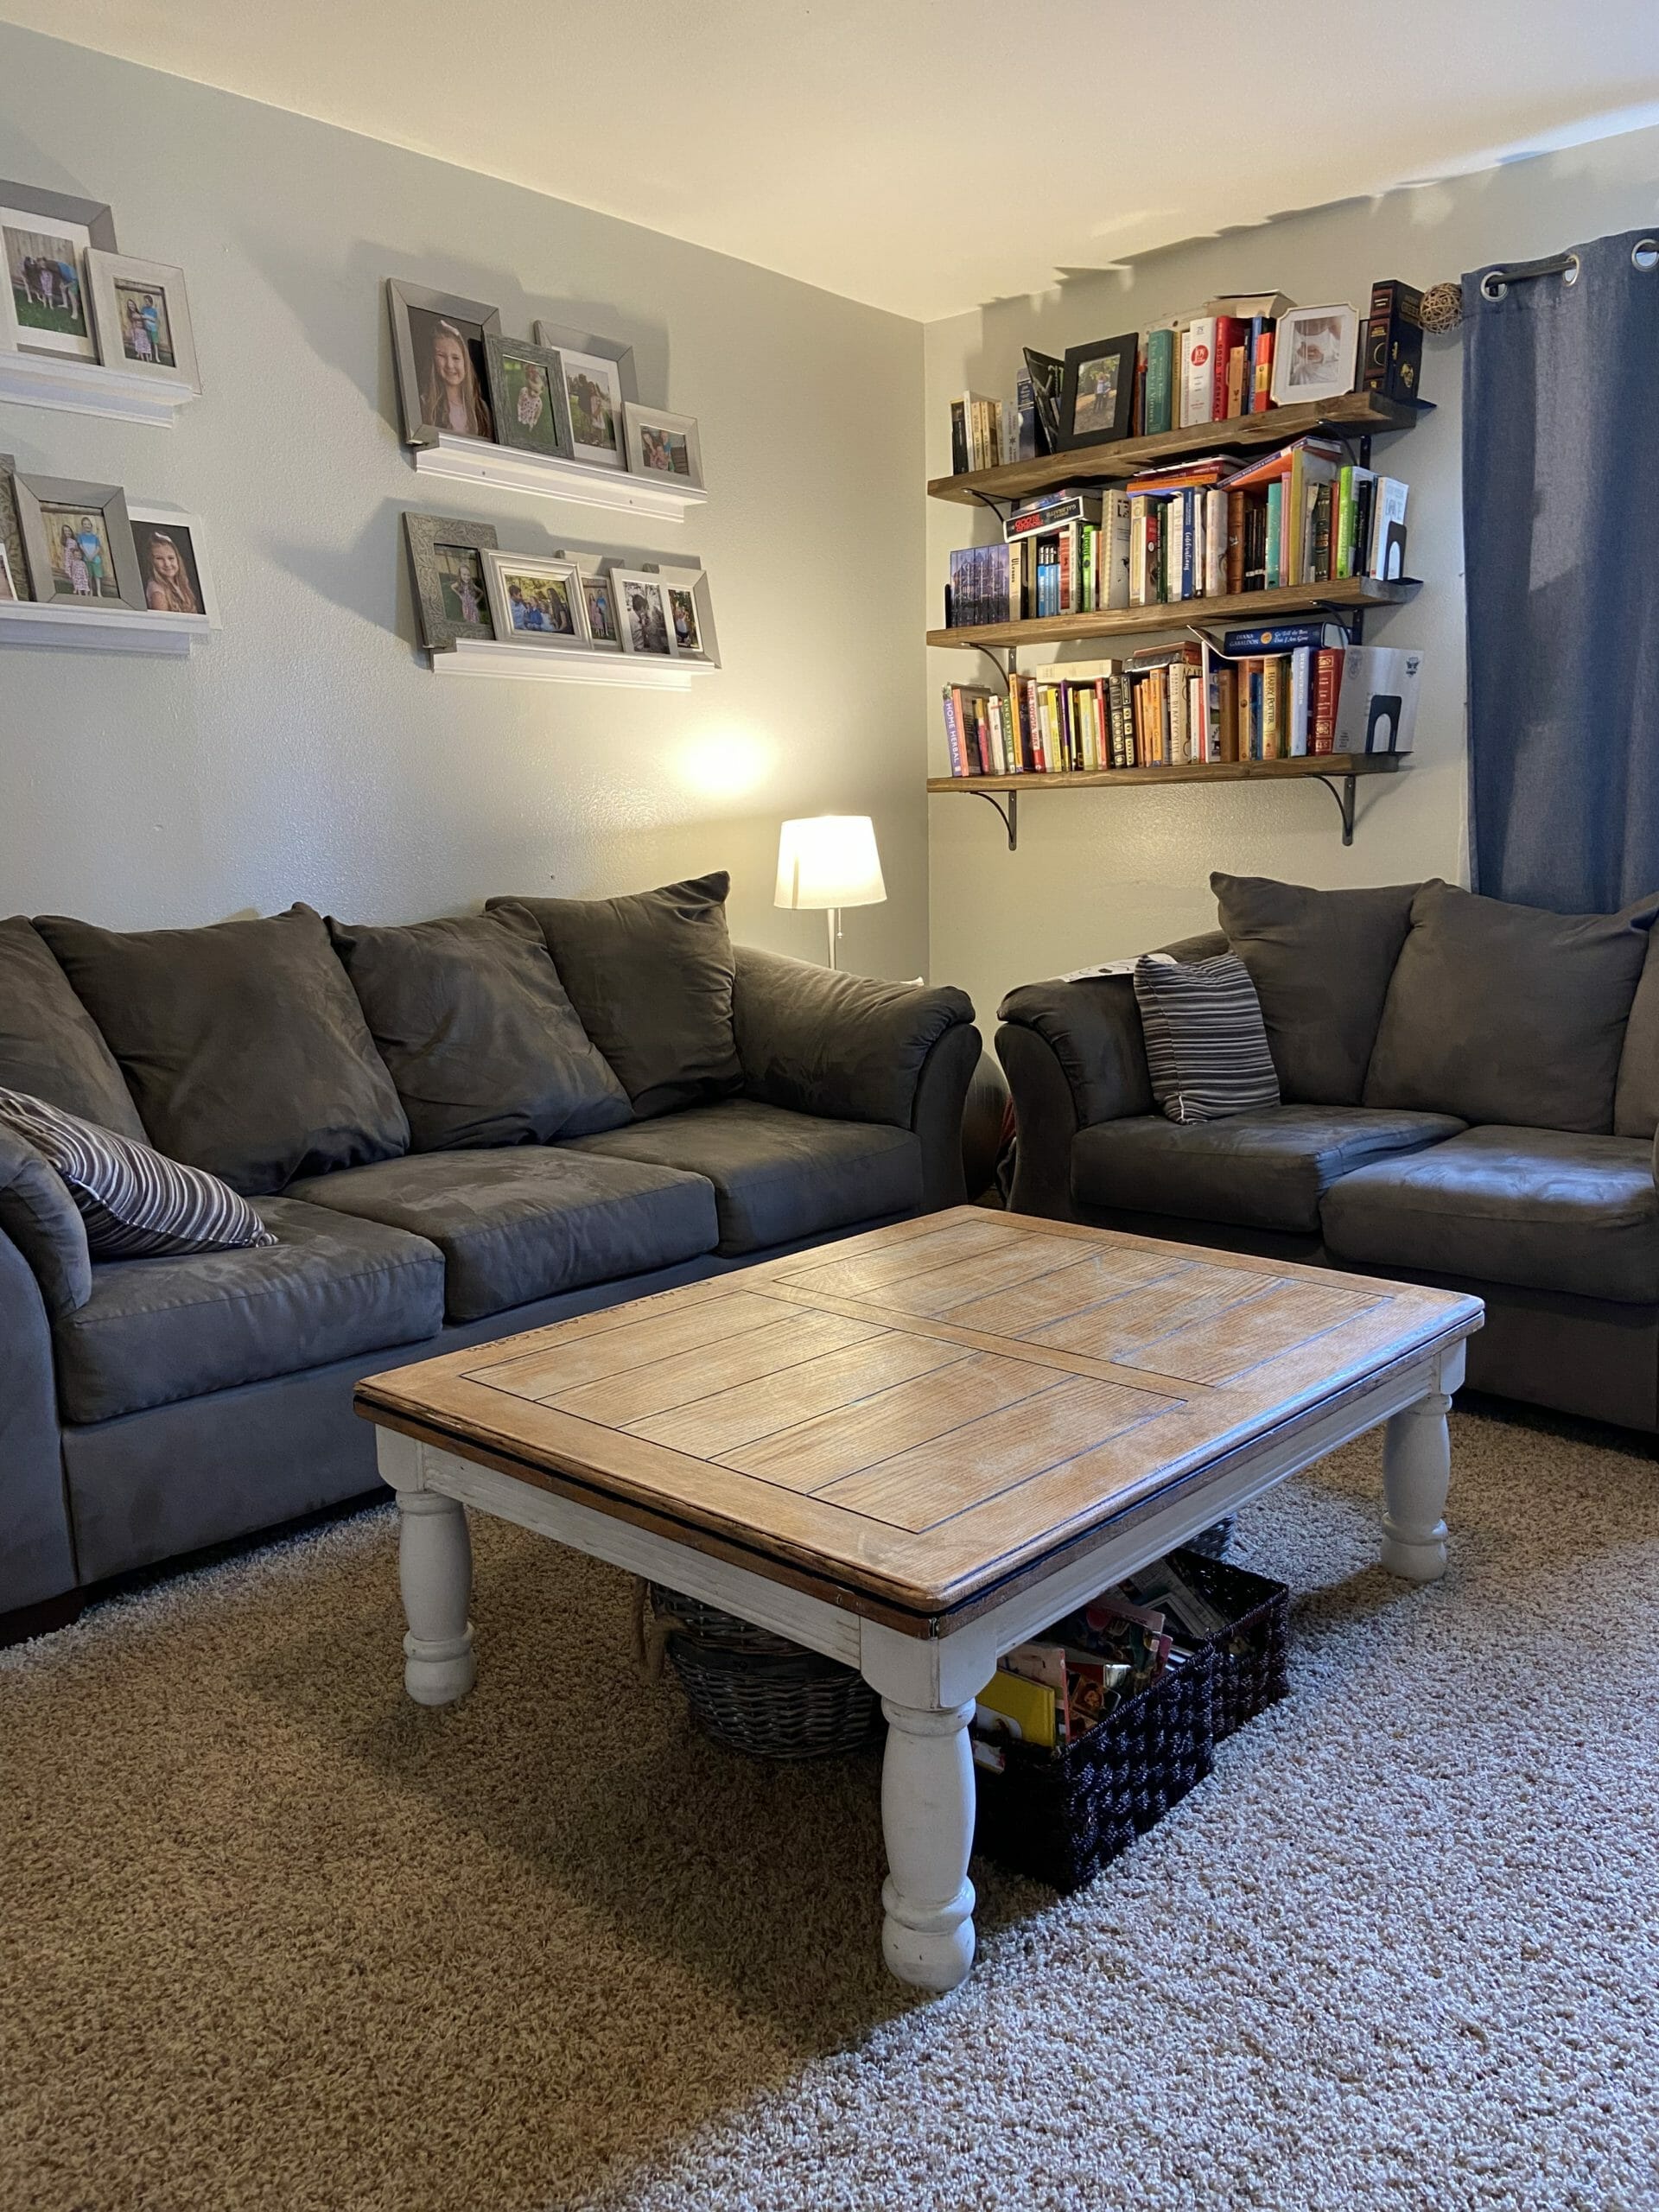
I love the rustic feel and the imperfections of the sanding, I think it adds to the charm. However, it’s not all about charm, I need this table to last, so I sealed it with A’s help with two coats of clear wax. I was really pleased with how well the wax went on and how well it dried. It repels spills really well- yep, it was inside for two hours before it was unintentionally tested with a pouch of apple sauce.
Pretty, right? It really brightens up the room.
I really hope it olds up well. I am happy it was such a quick and easy project.
This morning I was sitting in the living room staring over my cup of coffee into the kitchen- specifically, above the sink. Admid the Monday morning blur of pre-coffee thoughts, a single thought surfaced, ” why do I still have my ‘Spring’ banner up?”
Across the window that is in front of the kitchen sink I have a burlap banner strung that I made around March, it is very simple and says, SPRING.
The shame. It hasn’t been Spring in well, awhile…
For some reason this starting bugging me so I decided to make a new one. I was going to make a “Summer” one, but well, it’s kinda half way through Summer and I want something I can leave up awhile longer.
After wrapping up Caidoc’s Monday morning school and Zelie’s book reading, and a couple diaper changes, squabbles, and three freshly made beds, I sent the kids outside and got to work. I would say this banner could be made in about 30 minutes, but if you’re a mom like me then add another 30 minutes for checking on the kids, getting cups of water, pulling a toddler out of the garbage can, etc. 😄
Got some time freed up? Okay here we go..
Assemble your burlap, scrap fabric,a hot glue gun, iron, baker’s twine, stencil, and a marker.
Fold the burlap into equal squares. This isn’t science, I’m not precise about this part since I don’t mind it looking “rustic” 😜
Like the reused wipes container? Those things make the best craft storage.
Then, cut the burlap at all the folds
I folded enough to get 7 squares
Pick your fabric for the layer on top of the burlap. I picked this hideous green canvas I have because the “back” side of it is lovely! It looks like a white canvas with a hint of green. Repurposing hooyah.
After you’ve picked some fabric, cut smaller squares, as many as you have pieces of burlap. You could also cut different shapes to mix it up! You will have 14 total pieces.
Once you have all your pieces, grab your iron and iron the scrap fabric over the burlap, so that you end up with 7 pieces total.
Once all nice and flat, hot glue the squares onto the burlap. This only takes a tiny amount of glue.
After the glue is dry, grab your stencil and marker. I picked the phrase “Always” it is a quote from Harry Potter and has lots of personal meaning for me. I know what you’re thinking- “always” is only six letters! Well, I wanted a 7th square for a heart shape, which I free handed. I used my stencil to achieve a “typography” look. I used my blue baker’s twine to create the heart, I’m happy with the result! I secured the twine using hot glue. Don’t use the whole gun! Dip a toothpick into the glue, way easier and less messy!
Once you’ve gotten your word, words, or shapes on there, flip the pieces over and arrange BACKWARDS. This is very important, or you will have to hang your sign backwards and that’s just annoying 🙂
Take out a long section of bakers twine and lay flat at the top of the pieces ( leave 3-4 inches on each end). Hot glue them down- just a tiny bit of glue will do the trick.
I hope you all had a lovely feast day! We sure did. I got to start off my day with my first ever hot yoga class which I loved. My friend turned me onto a sweet deal and I can’t wait to go back. So, I got home at 7:15 am all refreshed (and extremely sweaty) ready to tackle the day. My awesome hubs had watched the kids (did I mention it was my first time leaving them?! BIG step for this mama!). He had them all ready to go so we could get him to work. I’m a lucky lady!
By the time we got back Zelie was very ready for her morning nap. She has been not doing well with naps lately. so, i prepped caidoc with his timmy time show so i could get her down and then spend some alone time with Caidoc.
When Zelie woke up we started our first activity of the day, green muffins!
How are these green? Why about 3 whopping cups of spinich!
Delish morning snack
Very popular with the kiddos! Couldn’t have done it without my little helpers 😉
While the muffins were baking I did a shamrock craft with Caidoc using a cork and some green paint. He loved it! And it will go into his art binder once its been up on the fridge for awhile.
He wouldn’t let me see his face for some reason
There he is!
I used the craft to explain the Trinity, and why Saint Patrick was important. Then I showed him a clover from the yard and he was so excited to paint them!
We made sure we dropped some muffins off for daddy at work since it is his feast day after all.
Dinner was extra delish since it is a feast day, boy, did we feast!
Baked potato with avacado and cheese. Kale salad. Polish sausage. I highly recommended avacado with baked potato. It is amazing.
I wanted Caidoc to watch this kid St. Patrick little video that’s just a 30 minute story about St . Paddy’s life, but he didn’t like the part where he gets kidnapped so he asked for it to be turned off 🙁 I was bummed. Maybe he will like it when he’s a bit older. I grew up with this movie and loved it, it’s very mild, but he’s very sensitive. He was so excited, oh well! Next time. I got a cute picture out of it anyways 😉
One of the best parts of the day was explaining to Caidoc that St. Patrick is the patron saint of Ireland and that Caidoc’s very own name saint was preached Ireland as a priest. Well, that story went over very well apparently because he went around talking about how today was “his” day. Hmm, well, close enough.
We made a table!! We are very proud. Hubs and I worked super hard on this beauty. From buying the materials to eating our first meal on it was eight days. Not bad since we are total amatures with wood working! (Did I mention hubs also replaced our electrical panel during those eight days!? That’s a whole other story, blah).
We very loosly followed a couple different tutorials on Pinterest but really we made the designed ourselves since we wanted something to reflect our home’s vibe, but also fit our budget.
We started buy selling our old table and chairs to give us capitol (a budget) to work with, sure that meant being without a table and chairs for a couple weeks while we planned and executed the project but, meh! Caidoc thought it was a lark, and to be honest, it wasn’t too much of a pain. It also meant we were “earning” our project so to speak, which is important for me since I like to get carried away with my DIYs 🙂
I’m gonna warn you, those tutorials make it look easy, and we didn’t have all the tools they all kept saying you should have (does anyone!? Seriously who can afford all those?) So beprepared to spend more money than those pins advertise.
All the consternation aside, I’m proud to say we made it within our budget ($110) and even got the exact look we wanted. I think we might make some tweaks but, honestly, I love it. And most importantly, we can now have much more people over for a sit down dinner! Yay!
I FINALLY FINISHED! It’s quite the triumph to be able to say that these days what with a two year old and an eight month old. In all honesty I probably only spent a month putting his room together, it was the planning phase that took me much longer. I wanted to really have his room be just perfect. I think we did achieved that! After we moved into this house I immediately had an idea for Caidoc’s room which was similar to the color scheme of his old room, and boy, did that come in handy! In planning out his room I had three goals in mind;
1. It had to grow with him.
I was so very tempted to go all out “cars and trucks” because I knew he would just love it! Not to mention I could find the cutest ideas all over Pinterest for a toddler boy cars themed room. But, in the end, I knew that it was impractical to set a theme since could very easily he outgrow it in a few months, or a year. So, rather than go with a set theme, I focused on timeless features, and a set up that fit his needs now and leaves ample room for tinkering as different phases come and go.
2. Bright colors.
Our new house has so much natural light which makes decorating much easier. Caidoc’s room is no exception, although in the winter there is significantly less light. I wanted his room to reflect his sweet nature and be bright, happy, and full of life. So I went with a color scheme that is quite cheery. Actually, colors can be rather hard to pick for a boys room if you don’t have a theme, because most of them are very dark and it is easy to end up with the traditional, and rather ho-hum, blue and red, OR you get stuck with “baby” colors- baby blue, whites, sage.. less “manly” looking. Since I wanted this room to grow with him, I wanted to stay away from softer colors that would make the room feel like a nursery.
3. Montessori aspects.
Caidoc responds so well to the Montessori lifestyle and I attribute that to his very strong-willed, confident, and curious nature. Since this is his room after all, I made sure to make it a place that he can ultilize on his own. I ditched the dresser since he can’t reach most of the drawers (and freed up tons of space!), and put all his clothes in small bins under his bed rolled neatly so he can easily see his choices. The bins are labeled to encourage word recognition as well as illustrations to show him what to wear in various types of weather. We upgraded his bed to twin that was really low to the ground so that he can easily get in and out by himself. My goal was that his room was a place where he could learn to help himself- and wow, has it worked!
I also did a bunch of research about Feng Shui for kids rooms (don’t laugh, I totally believe that stuff! Plus anything to harness good vibes 😉 And that is why the bed is “grounded” as much as possible and why there are pictures of himself in his room. It is important for them to be reminded that he is loved and that the space is “his”. Green is also a dominant color because it promotes calming feelings and orange promotes the bright and happy vibe I was going for.
If you are curious where I got certain items I’ll have them all listed at the end. If you are interested in anything homemade I will be posting a couple tutorials in the weeks to come. I apologize in advance for some of the cruddy pictures. I had “help” while I was trying to set this up 😉
Ready?! TA-DA!!!
As Caidoc calls it “OO C!” and point to himself 🙂 This is a plain ol’ wooden letter wrapped in washi tape and secured to the door with command strips
His mirror, nice and low to the ground so he can see how he dressed himself.
A bright button garland to dress up the mirror
So in love with how his room turned out
This is an awesome airplane my father in law made for Caidoc
I made everything but the canopy, which was another Amazon buy.
I made these book shelves and am quite proud 😉
This is a papasan cushion I got for new on OfferUp for 40 bucks! It was from Pier1 and a sand color. I made the cover for it. For a cozy reading nook plush pillows are a necessity. That bear is the first stuffed animal I ever received as a child. His name is Brownie which happens to be one of my nicknames for Caidoc.
Caidoc’s bed
Just LOVE these birch tree decals
This is his sweet little nightlight that he picked out. I found it on Land of Nod, but it was expensive! So after poking around the found the EXACT same one on Amazon. Win!
This is crate I already had that I turned into a storage ottoman for all his extra blankets. It can hold my weight!
This is the right side of the closet
Garland above the closet
Here are the clothes bins I was telling you about.
Left side of closet
Those are photos from his first birthday. In the middle in a sign the lovely Courtney made me . Points if you know where the quote is from 😉
Alright folks, that’s it!
Here is a break down of where I got everything and how much is cost ( I round up). See it’s possible to have a Pinterest worthy adorable toddler room on a very small budget!
Bed and linens: Ikea $50 (bed was on clearance)
Mattress: hand-me-down from Chris’s dad (it is such a comfy mattress!!!)
Crate: Fred Meyer $1
Fabric for pennants, crate upholstery, and cushion cover: Amazon $20
Shelves: handmade, with scrap wood, paint we already had
Dirty clothes bin: Fred Meyer $5
Garbage can: already had from my college days, decorated with tape that we already had
Picture frames: Target $1 each
“Until the very end” sign: hand made by my friend Courtney Cucchiara (who takes orders by the way! Let me know if you’d like her info)
Mirror: Fred Meyer $5
Curtains: Target ~$15 (with coupon and clearance)
Tree wall decals: Amazon ~$20 after tax (we have Amazon Prime to shipping is free for everything)
Canopy frame: Amazon ~$15
Cushion: Pier 1 $40
Orange bin: Ikea ~$10
Pillows in nook: Fred Meyer $5 (clearance baby!)
Faux Fur: Ikea $12
Green clothes bins: Ikea ~$3 each
Monkey bin in closet: gift
Nightlight: Amazon ~ $8
Wooden wall letters: We already had these from our old place but I got them from craftcuts.com I think it was about $30 including shipping
I have FINALLY finished my advent calendar that I have been making for Caidoc! It took a long time because I got SUPER side tracked by lots of things, first, I had to wait to borrow my moms sewing machine, I saved up money for fabric, and then I changed my plans because a friend of mine gave me a ton of awesome fabric! So, it turned into more of a project than I thought. I also probably made it more complicated than it needed to be and I’m a little rusty with sewing 🙂 Regardless, I am THRILLED how it turned out.
Isn’t is pretty?! Those pockets are what took me so long. I had to sew down ALL the corners after I cut them all the exact same size. And I’m really please that it’s kinda “eclectic” looking, because I think it makes it look more homemade 🙂 Did I mention the supplies cost about 10 dollars?!
Here is a pocket close up. So what I am doing is every other day is a piece of Caidoc’s nativity scene which it gets to place in the stable, baby Jesus being last of course. In between those days is a Christmas carol written down that we sing, okay really I sing and he dances. He LOVES music, so this is pretty much his favorite thing.
Did you spy the Dum Dum? That was originally bribery for doing the calendar each day, turns out I didn’t need it AT ALL. He LOVES it. We have only done it three times and all I have to say is, “Caidoc, its time for the Advent calendar” and he going RUNNING over to it. Win 🙂 So now the Dum Dum is just a plus.
I LOVE holly berries as a Christmas decoration. Like, seriously love them. It’s no surprise them made it on here 🙂
I am only showing you this wise man because he’s the only one you can see peeking out of his pocket!
YAY! I’m so excited. I feel like such a good mom when I get homemade projects done that Caidoc loves 🙂 I hope to keep this a family tradition for a long time.
I’m pretty sure Down with the Sickness is a song title, but maybe I’m just making that up since it sounds cool. You know what’s NOT cool? Pregnancy causing loads of fatigue, morning sickness, tender boobs, bloating, and THEN your toddler get’s sick. Yay…
I suppose I have no one to blame but myself for at least ONE of those things 😉 but I should probably be held responsible for poor peanut getting sick too. Last week, I said to myself, “Self, you are going to be a super outgoing mom this week and have lots of play dates and get your only child all socialized up.” Stupid self. Now, I don’t regret those play dates, I felt so brave venturing out everyday even though I felt like poop. Caidoc had a wonderful time as well. Of course now he is sick because his stupid mom probably got in over her head with all her grand ideas of “socializing” and “being adventuresome” , well I learned my lesson. Ugh.
Caidoc doesn’t handle being sick well. Some babies start to sleep lots when they are sick, Caidoc stops sleeping altogether. He also becomes a whining, begging, irritable tyrant. No joke, he puts some medieval kings to shame. Due to his general unpleasantness, Husband and I both slowly become worn down and start to resemble the zombies from Walking Dead (um, anyone else excited for Sunday?!?) and when I say resemble, I mean we look and act exactly like the zombies from Walking Dead except we turn into nose rags for Caidoc constantly dripping nose. Needless to say, we don’t handle Caidoc getting sick very well either. The weekend just got exponentially more dfficult with our dryer crapping out of us, right when I had a mountain of laundry to do, and Chris needed clean clothes for his business trip. I’m hoping it gets fixed soon since that mountain is now slowly spreading into a vast range across our room.
Our weekend plans got hijacked since Caidoc was so miserable, which included me running a 5k race I was SUPER excited for. It’s probably for the best, now that I look back, since we are STILL recovering from sleep depravation. Anyways, despite all my whining (wonder where Caidoc get’s it from? Yeah, me neither) we did have a couple cool things happen this weekend.
First off, we went to the circus! YAY! It was super duper cool. We only got to stay for half since thats when Caidoc really started melting down and I was already pretty sure he was coming down with something. Nevertheless, Caidoc got to see elephants which, made it all worth it 😉
Second, we stopped by, kinda on accident, a JBF consignment sale for baby stuff and mom stuff and IT. WAS. AWESOME. I got some books, and some sweaters for Caidoc and *ahem* a $7.50 highchair for Caidoc. WOOT! Can you say STEAL?! Anyways, I’m hooked on them. For anyone that’s wondering, there is another one happening in Puyallup on the 18th and I highly suggest checking it out.
the mini ATV Caidoc fell in love with at the JBF sale
This morning, to help cope with the sicky lil dude, I ran to the store to pick up some fresh raw garlic to make a salve. It turned out great and I’m already seeing results with Caidoc. Love it. Here’s the link to the recipe I used. I also just love this blog in general. She’s a kindred spirit, I can tell…and not just because she refers to her child as “hobbit” :). The only alteration I made to the recipe was to add about five extra drops of lavender–that garlic is potent. Caidoc now just smells like stadium garlic fries to me *YUM*, but I’m sure that will get old soon.
I’m also going to make this stuff, because I think it will keep lil dude entertained. Well, it better since taking him outside or trying to do much of anything with him results in fits and crying. *sigh* Can’t wait to have my normal Caidoc back especially since Husband is going out of town and I become a totally wimp without him.
Well, that’s all for now, have a good week and wash your hands!
On Saturday we went to the wedding of a couple of our friends and had a BLAST. They are so sweet and such a cute couple. We wish them all wonderful things the world has to offer. WELCOME TO THE CLUB GUYS! 🙂
The lovely wedding ceremony
Loves gravel he does haha
Flirting with Olivia 🙂
On Sunday, Husband spoiled me and let me do a massive splurge on crafting supplies. I’m very excited about all of them. Some of them include getting back into knitting sewing, yay! Here is what I’m working on knitting, except mine is pink. It’s going to take a really long time because I knit very, very slowly. Haha.
I’m also going to try a craft from my friend’s blog, because I have a disgusting lamp that needs serious help. My lamp is very large though, so this craft will also take some time I think.
Here is what I made on Sunday while my boys napped.
My first burlap wreath! I am really proud 🙂 It was harder than I thought it was going to be.
May I draw attention to the flowers? I love them. They also both have pearls in them, but I hadn’t stuck in the second one when I took this picture. Also, sorry for the crappy picture, I used my iPod Touch.
A close up! I LOVE this wreath! NOw we have some fall decorations ready to go.
Annnd to finish, why not some super cute pictures of Caidoc..
Summer is almost over! Sad. I am kinda ready for chunky sweater and legging weather though. Also, with fall coming, it means it’s almost my birthday 😀
I got all these berries from the farmer’s market on Saturday (remember when I talked about heathy family rituals? We go get our produce fresh each week!) and I needed something to do with them. This week was blackberries and golden raspberries. I love berries and so does Brownie.
I found this recipe, and boy, I love it! Except the cornstarch part, yuck. Something I discovered recently though, while making a delish strawberry rhubarb crisp, is that an amazing super healthy substitute for cornstarch is MILLET FLOUR. It is so good for so it makes making pies and make me feel all healthy 🙂
The second thing I do that makes life A LOT easier, is that each month a make a ton of pie crusts and freeze them. That way, I have allergy free crusts on had for when I want to whip up a berry pie, apple pie, or Husband’s favorite, chicken pot pie 🙂 My mom really did not like making pies because the crust was always “too tedious”. And I agree, having pre-made crusts makes what could be an hour long process, only minutes. And when you have a busy little boy running around, it’s important that things only take a few minutes! So scroll down for my super secret Summer Pie hints.
Here is a mixture of blackberries, golden raspberries, and some blueberries (the blueberries are from my grandma’s garden)
This is a pre-made crust. I wish I remembered how I made it because it works LIKE A CHARM which is rare for allergy free crusts in my opinion
It’s so important to not skimp on spices, I believe they make or break baking. I always throw in extra nutmeg (when called for) and vanilla, and it’s never failed me 🙂
The secret to so much of my baking. I use this in everything from pie fillings to thickening sauces
Make sure everything is mixed SUPER fine, or you will get chunks of yucky crap
I don’t believe in rolling crust out perfectly. As you can tell.
It all ends up pretty in the end 🙂 I left the cut out on top because I don’t like waste and all the edges were sealed up tight. Make SURE to leave holes, unlike chicken pot pie, berry pies LOVE to explode everywhere.
The felt board is finally up! It’s about time! These pieces were pretty labor intensive, but it’s finally up and I am really pleased with it.
The pigs
The barn, complete with hay bale
all of the animals finished and ready for the board!
the chickens, Caidoc’s favorite 🙂
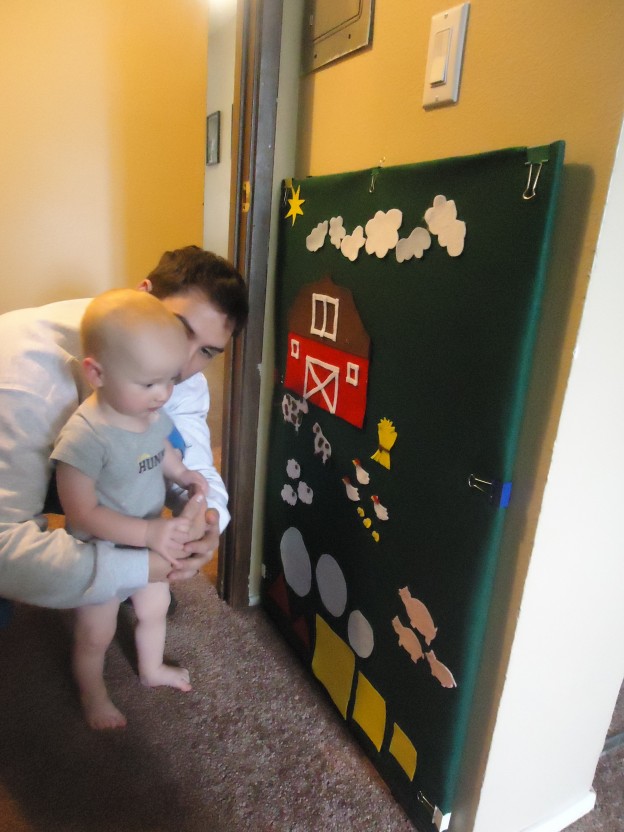
Showing Caidoc (who just woke up) the fancy felt board! He was underwhelmed at first…
The finished product! I’ve also added some shapes, which is more his speed right now than the animals, although his FAVORITE by far is the sun …not sure why.
The only thing left is to make cute containers for all the different scenes I plan on making. I think I’m gonna do that with the wipes containers we get with all our diapers and wipes each month. Easy peasy!
I’ve been really busy setting up my Etsy shop, redoing a lot of our finances and planning for all our summer trips coming up so pardon the sporadic posting 🙂